For many of our shows, it’s important to mat and frame the photo so it hangs from a wire backing. Here is how to mat, frame, and wire a photo.
Most of us mat our own photos. Here is how you mat your photo.
A note first: It’s important to look for mats and tape which are at least “acid-free”. If you use a mat which has acid in it, that acid will interact with the paper of your print / artwork and over time the edges of that artwork will turn brown. The acid-free mat and tape will not interact with your print – they will ensure your print looks the way it should for years to come. “Acid-free” is actually the lowest level of material you should use. Working up from there, you next reach conservation / archival mat board, museum / rag mat, and then at the very top, museum board. It is up to you and your budget which level you use. Wikipedia Page on Mat Levels
Start by laying your photo down onto a flat surface. Put pieces of tape on the top BACK of your photo, facing up.

Here’s a closer view, as I know this can be confusing. You want the sticky side of the tape UP because it is going to stick to the back side of the mat you’re about to lay on top of it.

Now carefully lay the white mat down so that it showcases the part of the print you wish to have seen. Make sure there are no white edges at the sides of your photo. If you’re planning to reuse this mat in the future it’s a good idea to have packing tape on the BACK top of the mat – where that print’s tape is going to connect to the mat. That will make removing the print’s tape from the mat in the future much easier. When you are satisfied with where the mat lies over your photo, press down hard on the area with the print’s tape.

Now carefully turn the mat-plus-photo upside down. See how the print’s tape is connected to the packing tape area?

Now add more tape to ensure the photo stays in place against the mat. Note you ONLY want to tape the top side. This allows the photo to hang flat. If you tape any other sides you risk the photo torquing over time.

You now place that print-plus-mat into your frame and add the back. Use whatever spinning levers are on the back of the frame to hold the backing into place. The mat-plus-print should now be sealed within the glass. The mat keeps the print from touching the front glass.
Many frames will come with the back properly wired. If your back has a saw-tooth hanger or a triangle hanger, you’ll need to wire it yourself.
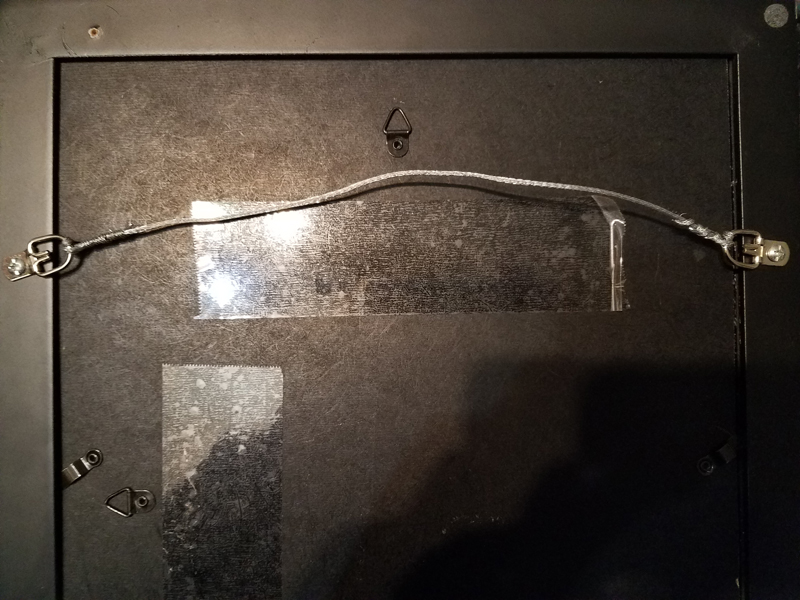
To wire the frame, it’s best to get two D-rings. They will lay flat against the frame. Screw holes into the back left and back right of the frame, about a third of the way down. Screw the two D-rings into place, facing each other. Now get framing wire and loop it through twice on one D-ring, leaving one end long enough to go across the back of the frame plus another foot or so. Wrap the short loose end of the wire around the main wire to secure it. Now take the main wire over to the other D-ring and send it through that ring twice. Wrap the loose end there.
Note that the wire should be pulled tightly enough that it is NOT visible from the front when the picture is hung. There should be no sign of the wire when the art is hung on the wall.
We’ve had several artists try 3M stick-on tape on the back of their frames, and then run wire through that 3M stick-on tape. The 3M tape has nearly always fallen off in just a few days. I know it’s tempting, but avoid those 3M stick-on tape options. Use screws. If you’re using a foam backing, use small screws. But good screws will always be more reliable than 3M stick-on tape.
For the back-of-art label, it’s a good idea to put packing tape across the back of the artwork, to tape your image information to. You should always tape a sheet with the image details on it before any show – the artist name, artwork title, price, and your contact info. That way it is there with the artwork.
It’s likely you’ll reuse this frame if the art doesn’t sell, and by taping your info sheet to packing tape you can remove the info-sheet and add a new one without damaging the back of the frame.
Ask with any questions!